Really simple bending for a rack platform

I published a blog entry a long time ago with a “simple” way of bending tubing. It is far more complex than what I actually do today. I’ve been meaning to write a followup for over a year, but always forget to take photos when I’m bending up a rack deck. I’m going to just do it in words. Hopefully I’ll update this in the future with photos, but in the meantime this drawing will have to do.

The instructions here are for making a 10″ x 14″ rack deck using roughly 4′ of 5/16″ tubing and a bender that has a 15/16″ radius. The straight sections of the rack deck will be 12″ and 8″. The 15/16″ radius for each bend makes the rack about 2″ wider and 2″ longer than the straight sections in each of those directions.

I always make my bends to the right. There is no math in this method except for basic subtraction and dividing by 2″.

Bend 1:


  • Mark a line 6″ from the start of the tube.

  • Align that mark with the 0 on your bender.

  • Bend to 90 degrees and mark where the 90 is on the tube.

  • Check with a square to make sure that it is actually 90, tweak as necessary.


Bend 2:


  • Mark a line 8″ from the last mark (the start of the next straight section)

  • Align that with the 0 on your bender

  • Check that the bends are in the same plane. I do this by spotting down the bender to align the tube with the bending form.

  • Bend to 90 degrees and mark the 90

  • Check the 90 with a square. Check that the bends are in the same plane using a flat surface. Tweak as necessary.


Bends 3 and 4:


  • Repeat the same technique for bend 2 with distances of 12″ and 8″.

Closing the loop:

  • After bend 4 mark a line 6″ from the start of the last straight
    section. That should line up with the start of your rack deck. Cut
    off the excess tubing (a couple of inches) and splice.

If you want a different size of rack deck then just pick different numbers for the straight sections. Most of my recent racks have been 12″ x 11″ long, so I’m using 10″ and 9″ straight sections.

You can put the splice anywhere that seems good. I just tend to center it because it keeps the math simple.

Lots of projects brewing

Here is a single photo with 3 of the 4 that I’m writing about today:

First up is what I’m calling the Ivy-T. It is the replacement for my RB-T that I’ve been using as my commuter and road bike for the last few years. The new bike is sort of a joint project between Brandon Ives (IvyCycles) and I. He built the frame, I’m going to be doing the final bits on it (bridges, brazeons, brake bosses) and making the fork and rack. The geometry is basically a 56cm 1994 Bridgestone RB-T with the seat tube extended to 59cm, the top tube extended a bit, and a slightly sloping top tube. The lugs are Prugnat-style fromLong Shen. The tubing is Kaisei 019 (0.8mm/0.5mm/0.8mm butting, standard diameter) and the dropouts are Paragon verticals. It is a pretty light frame right now at around 3lbs, 12oz. I expect it’ll be more like 4 pounds once I’m done with it. Brandon’s work look very good and I look forward to finishing this one up.

Click the headtube for more photos:

Next up is a rack for Christine’s new bike.I’ve made about 80% of the deck, I still need to put in 3 more rays for the sunburst. We ordered a custom bag for her bike from Swift Industries. I’m going a little outside my normal with the rack and making the rack a little more pretty than what I would normally do. The pattern on the deck is influenced by anAhearne rackfrom the 2007 NAHBS.

John Speare gave Rory his beloved (or behated) Fuji Turd. Rory is turning it into a cycle truck, which I guess will probably become called the Turd Hauler (John calls the first cycle truck that we built the Stuff Hauler). Rory came over this morning and we mitered the cargo tube and top tube. When I built the first cycle truck a few years ago that process took me at least a full day. This time we did it in about 2 1/2 hours, including at least 30 minutes of searching for my 1 3/4″ tube clamp. Experience and a good milling machine do speed things up. Click the image for some iPhone quality images that Rory took of the process this morning.

Finally, I’ve been meaning to write about my new CNC mill for at least a month,but haven’t gotten around to it yet.

I bought this two months ago from Craigslist as a birthday present to myself. It is a Taig (made in the US) benchtop 3-axis CNC mill. What does that mean? The mill can move an object in two axis (X and Y),and then lower a tool (like a drillbit) from above in the third Z axis. CNC means that acomputer does the tedious work of moving the work around and cutting metal. Since computers don’t get bored it is happy tolots of timecutting out pretty intricate stuff. My first project with it was programming in all of the parts for the fork jig and making another fork jig for a fellow framebuilder. Once I have some feedback on it I plan on making some more. I’ve also used the CNC mill to make some simple fork dropouts (for yet another project) and lots of little fixtures.

In this photo it is making some brackets for the fork jig:

Here is what the computer shows while doing the heavy work:

The final result only requires a tiny bit of hand cleanup:

Fork fixture V2, almost all of the parts were made on the CNC mill.On the lower right corner you can see one of the brackets that the mill was cutting out above.

I plan in following up with more CNC stuff in a future posting, including some videos of it in action. For now I’m still mostly in the learning stage.

Orcas Island

We visited Orcas Island for a 4 day weekend of kayaking, cycling, hiking, cooking, and relaxing. March is a good time to visit, it is still the off season so you can get good deals on lodging (we rented a little waterfront cottage for about 1/3rd it’s normal rate) and the crowds are lower, but the weather is good enough to spend most of your time outside. Everything was very green. I really enjoyed cycling the trails in Moran State Park and kayaking in West Sound.

all photos

Fort Ebey Overnight Tour

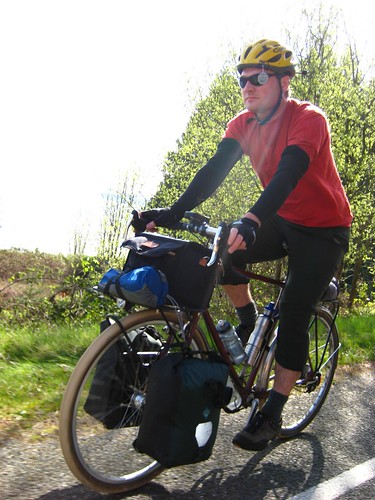
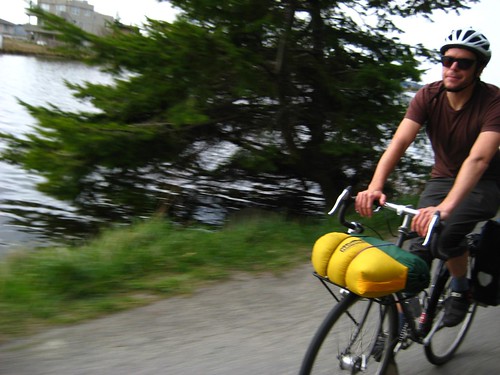
Andre, Andrew, and I celebrated the first weekend of spring with an overnight trip to Fort Ebey State Park on Whidbey Island. Last year the three of us also broke in the camping season with a one nighter bike camping trip together, and hopefully that is a tradition that we keep up. Andre came up with scenic and winding route that headed up Whidbey Island with lots of time to explore Fort Casey and to play on the trails at Fort Ebey. On the way back we made a b-line for the ferry and took the highway the whole way. That was expedient and about half as many miles, but the riding wasn’t as nice.

The weather during the day was mostly great, although the temperature seemed to be going through some wild swings. I recently purchased a pair of Ibex arm warmers which got a lot of use. I also tried out a new bivy (loaning Andrew my normal hammock) and found that it worked well. I was plenty warm (maybe too warm?) and comfortable. It didn’t get too cold at night (I never even used the jacket that I brought along), but there was heavy wind for a few hours in the middle of the night. That seems to hit the bluff, blow up into our camp, and make some crazy noises in the tree canopy. Andre and I were pretty well protected behind a thick tree, but Andrew was hanging in a hammock and got blown around a bit. We had to fight that same wind during much of the ride back to the ferry in the morning.

This was my first camping trip on my new bike, Gifford. It handled
nicely when loaded. The plush Grand Bois Hetre tires work nicely on
pavement and on the Fort Ebey singletrack. I sort of wish I had set
the bosses for the lowrider rack slightly higher, it is nice to have a
bit more ground clearance than you get with the stock Tubus Tara
setup. The low bottom bracket was noticeable on thesingletrack,but I could have flipped the eccentric to raise it about 10mm if I planned to spend more time offroad.

I was really impressed with Fort Ebey. The camp sites were great. I wouldn’t mind returning there again,perhaps with a regular mountain bike and time to explore all of the trails. We only touched a small part of them.

Thankfully Andre took lots of great photos, because I took few of them. Hover over them for a caption and to see who actually took them, but just assume most are from Andre.

map GPX my photos Andre’s photos

Paying at the Ferry. Photo by Andre.

Gifford and I, loaded with basic camping gear.  Photo by Andre.

Andrew.  Photo by Andre.

Andre.  The grimace isn't normal, but it is the one photo that I took of him riding.  Photo by Alex.

Playing on Fort Casey.  Photo by Alex.

Playing in Fort Casey.  Photo by Andre.

Fort Casey Lighthouse.  Andrew reported that the lighthouse room was hot.  Photo by Alex.

A trail between Fort Casey and Fort Ebey.  Photo by Andre.

At the Coupeville Red Apple I bought 3 items, Andrew bought about 5, and Andre bought about 20.  Guess who was hungry!  Andre treated us all to ice cream!  Photo by Andre.

Kettle's Trail heading into Fort Ebey.  Photo by Andre.

This was our view from the bluff at Fort Ebey.  No wonder the group camp is called

Paraglider over Fort Ebey near dusk.  Photo by Alex.

Sunset over the bluff.  Photo by Alex.

We camped in this clearing.  It was a great size for a couple of bivys, a tarp, and a hammock.  We setup after dark and struck before light, so we don't have photos of the actual camp.  Photo by Alex.

Heading out for the ride home.  Photo by Alex.

Christine's New Bike

Christine has been taking more of an interest in riding her own bike recently (normally we just ride the tandem together). Yesterday she also accepted a job which is a short bike ride away on the Burke-Gilman trail. I had extensive plans for modifying her old frame (so extensive that in the end perhaps only the seat tube, down tube,and chainstays would have remained), but then I saw the Soma Mixte at Free Range Cycles and realized that it would a better option.

I wanted to build her new bike around a Nexus 8sp hub, and the Soma has horizontal dropouts which made that easy. The 50cm frame is perhaps on the upper edge of what would fit, but it works well (much better than her old 13″ Novara Randonee). Oddly the next size down for the Soma Mixte is 42cm, with nothing in between.

I built the bicycle up with 650B wheels (it is designed for 700C wheels). 650B wheels fit easily when you use the 75mm reach Tektro R556 brakes. The rear brake only reaches if you have the wheel towards the front of the very long horizontal dropout, but it wasn’t hard to find a chainring/cog combination which made that work. When built up with these wheels and brakes there is plenty of room for wide tires (I used 38mm wide Mitsuboshi Trimlines) and full fenders. The fenders were easy to mount on this bicycle because Soma included threaded bosses on both the seatstay and chainstay bridge.

The bike will gain a couple of accessories in the next couple of months, but it is very rideable today. They are a front porteur rack (we’re getting a Pelican bag from Swift Industries for it) and a Hebie Chain Glider to enclose the chain.

It was hard for me not to think of the frame as a project and immediately start modifying it. At some point I expect that it will come under the torch. At that time I’ll make the following modifications:

  • Move the chainstay bridge back about one centimeter. The fender is mounted with a very long spacer that is sure to loosen up.
  • Move the chainstay cable housing stop forward about 15cm. The Nexus hub requires the cable housing stop to be quite a bit forward from the normal location. This will eliminate the ugly zipties that I’m using now.
  • Maybe switch to V-brakes.
  • Maybe build a new lower trail fork.
  • Remove the downtube shifter bosses and replace them with a single cable housing stop.

We took the bike on it’s inaugural ride last weekend, riding down to Magnuson Park and back. Christine reports that it handles nicely and she really likes the smooth shifting of the Nexus hub.

Component list for the bike nerds among us:

  • Frame/Fork: Soma Buena-Vista Mixte
  • Headset: BBB 1 1/8″ threadless
  • Handlebars: Jitensha City (made by Nitto)
  • Grips: Ergon GC1, with lavender tape on the rest of the bar
  • Stem: Origin-8, 9cm,17 degree
  • Shifter: Shimano Alfine 8sp
  • Brake Levers: Tektro Eclipse
  • Cranks: Shimano 105,165mm, 130mm BCD, 38t chainring
  • Pedals: MKS RMX (aka Rivendell Sneaker)
  • Front wheel: Shimano DH-3N70 hub, DT 14/15ga spokes, Velocity Synergy rim
  • Rear wheel: Shimano SG-8R36 8sp internal hub, DT 14/15ga spokes, Velo-Orange PBP rim
  • Tires: Mitsuboshi Trimline 38-584 (650B x 38mm)
  • Seatpost: Nitto
  • Saddle: Serfas Curva
  • Fenders: Berthoud 650B x 50mm
  • Brakes: Tektro R556
  • Bottom Bracket: Shimano UN72, 113mm

A late spring ride in the middle of February

There aren’t many days in the middle of Seattle’s winter when it is sunny and approaching 60. We’ve had 4 of them in a row, starting with my birthday on Feb 18th. I’ve been doing my best to make use of all of them.

Today Andre, Rory, Jimmy, and I set out for a ride from the Southworth Ferry Terminal. Andre picked the route and thought it might have a mix of low traffic paved roads, dirt, and maybe some areas to explore for future camping trips. We found all of that and a few state parks that had never heard of (and which don’t show up in the list of state parks), some hike-a-bike, and a very nice beach where we had our lunch. I can’t really imagine a better ride for this time of year. Andre’s route even got us back to the ferry terminal just as the sun was starting to set.

Click on the photo for a slideshow or jump straight to the gallery:

Andre’s map of the route: http://www.gmap-pedometer.com/?r=3493123

Gifford: Powdercoat and Details

This color is hard to photograph. I’ve done my best at getting an accurate portrayal in these photographs. It is a brown with a lot of red in it. The Surly Karate Monkey comes in a similar color.

In this photo you can see how clean the fillets look with paint on them. You can also see the taillight cable getting hidden into the downtube:

The taillight wire comes out at the bottom of the downtube and runs under the chainstay to the light itself. The light is attached to the Rohloff shift box that is also under the left chainstay. In this photo you can also see the Rohloff cable guides (which I think look good now that they are painted) and the adjustment bolts for the eccentric bottom bracket.

I made a mount for the taillight using a stainless steel spoke. The wiring still needs to have the proper connectors crimped on and to be trimmed:

I built a new rack for this bike. It is probably the most nicely finished rack that I’ve built. It works with my Pass and Stow bag (which snaps to the rack) and my Acorn bag (which attaches with Ortlieb hooks to the front crossbar). It is designed to make the bicycle work well with Sportworks bus racks.The bus rack hook that holds down the front wheel can get right up to the fender.

The cable routing for the headlight on the fork was done so that the wiring can be removed without unsoldering the hub connector. The lighting is routed using pairs of hooks which are facing in opposing directions. You can turn the wire 90 degrees to remove it manually, but it won’t do so on it’s own. The hooks were made with 1mm diameter steel wire. There are two wires in this photo, one going from the hub to the headlight, and another going from the headlight to the taillight:

A final full bike shot:

There are some more photos on my smugmug site:

The todo list is getting very short and none of it prevents me from putting a lot of miles on this bike:

  • Custom stem
  • Build up my SON20 based front wheel. That one will be lighter than the current wheel.
  • Trim the wire for the tail light.
  • Make a fender guard so that I can remove the rear rack. It is only there to protect my rear fender from the spring loaded rear wheel hook on my employer’s bicycle shuttle.

This winter has been pretty mild and spring is coming fast. I expect the tone of the blog to change back from project statusto trip reports soon. I already have tenative plans for an overnight ride at the end of March if the weather is good.

Spoke Insertion Tools and other small bits

I made one of these when I was first playing with my lathe, gave it to John Speare, and forgot about it. He told me last week that he uses it with every wheel that he builds, and asked if I’d be interested in making 12 more of them for Pedals 2 People’s wheelbuilding class. It is just a dull needle with a rough spiral on it that a nipple can sit in. You place the nipple into the tool, use the tool to push it into the rim, then remove the tool. It makes life easier on rims with deep cross sections where the nipple can get lost between both walls.

I’ve never really made a “run” of anything on my manual lathe before, so it was fun to think through the process to make a bunch of similar objects. Once I got the system down these took about 3 minutes each. Some are short because the needle bent or broke during manufacturing, so I just shortened the body and made a new needle. Those ones probably took 5 minutes. Figuring out how to do it in an efficient manner took me about an hour. So two hours of work, but next time it will be one.

Andre Ball built up a Schwinn Traveler with a Nexus 8sp hub. The chainstay cable housing stop on that bike is very close to the dropout and that short cable run made it difficult to remove the rear wheel. This is an under the bottom bracket cable housing stop and cable guide. It replaces the plastic cable guide that you’ll find on most bikes.

Being able to fabricate small bits like this can be very useful.

Metric Bolt Kit

I find it handy to have a variety of metric stainless bolts around when assembling bicycles. My kit is running a little light and some other friends wanted similar ones, so we put together a bulk order from McMaster Carr. I thought I’d document the kit that we put together while I had the part numbers handy.

This spreadsheet shows a nice kit which can be split among 4 friends and costs about $30 each at today’s pricing:

Description Part # Per Pkg PkgPrice PkgQty BoltQty PerPerson Why get it?
M5 x 8mm, socket cap 91292A191 100 6.83 1 100 25 $1.71 water bottles
M5 x 10mm, socket cap 91292A124 100 7.68 2 200 50 $3.84 fenders
M5 x 12mm, socket cap 91292A125 100 7.29 1 100 25 $1.82 racks
M5 x 16mm, socket cap 91292A126 100 7.44 1 100 25 $1.86 SKS fenders
M5 x 20mm, socket cap 91292A128 100 7.76 1 100 25 $1.94 fenders + racks on same bolt
M5 x 10mm, button head 92095A208 100 11.41 1 100 25 $2.85 fenders (direct mount)
M5 x 16mm, button head 92095A212 50 7.91 2 100 25 $3.96 fenders (direct mount)
M6 x 18mm, socket cap 91292A136 50 $8.57 1 50 12.5 $2.14 canti, seatpost binder
M5 nylock nut 93625A200 100 7.67 1 100 25 $1.92
M5 washers 93475A240 100 2.81 4 400 100 $2.81
M5 fender washers 91116A140 100 5.34 2 200 50 $2.67
M6 washers 93475A250 100 3.4 2 200 50 $1.70
$29.22

There are a few changes from my old kit above. I dropped the longer M5 bolts because I don’t use them very often. I added some M6 bolts in a length that I find useful for cantilever brakes and seatpost binders. I also added some button head M5 bolts in the sizes that I use for direct mounting fenders.

Gifford

The TODO list is getting short, and got short enough for me to build it up for some shakedown rides. Remaining on the list:

  • Wire guides for the headlight
  • Racks (this one is borrowed from my RB-T)
  • Paint

A couple of small details. This is how I routed the cables to the Rohloff (always a little tricky):

The wire guides are cut up and bent pieces of a spoke. I liked them better than the commercial guides that I could find. Running the cables over the bottom bracket and then around the inside of the chainstay gave me a much nicer cable run than under the bottom bracket (which is very large on this bike).

Tire and crank clearance came out just about perfectly. A 2″ or 52mm knobby fits and so do my lowish Q-Factor Ritchey cranks.

I removed the big ugly Rohloff sticker from the hub (now that my warranty is expired):

It weighs 30# as shown. A little chunky, but not too bad fora Rohloff’d bike with fenders, racks, pump, water bottle cages, etc.

I’ve named it Gifford in honor of Gifford Pinchot, since I expect that this bike will spend a good amount of time (and the most enjoyable time) in National Forest lands.

Brief set of geometry specs:

  • 55cm seat tube (actual), 58.5cm (virtual)
  • 57cm top tube (actual), 58cm (virtual)
  • 5 degree top tube angle
  • 73 degree head tube angle
  • 72 degree seat tube angle
  • 60mm fork offset, for a hair under 40mm in trail
  • 44.5cm chainstays
  • 9/6/9 True Temper Verus main frame tubing, Dedacciai COM12.5 fork blades,Nova Cycles bent/ovalized chainstays
  • Rohloff hub
  • Easton Eccentric bottom bracket
  • It will get a Schmidt 20R front hub,but right now it has a Shimano DH-3N70
  • Shimano BR-R550 Canti brakes
  • Grand Bois Hetre tires with Velo-Orange 52mm wide fenders OR
  • Pacenti Quasi-Moto knobby tires with no fenders