Archive for the ‘deck’ Category.

Some Projects Wrap Up, Others Begin….

I rode about 60 miles on the Cycle Truck during the last week. During the week I was just riding it as a naked bike, but yesterday I fashioned together a basic container using a recycle bin and some muffler clamps. It’ll do until I have a chance to build a real front rack (right now I’m waiting on metal, tools, and my bag!).

Muffler clamps and U-channel make a temporary rack

Alistair gives it a spin around the block

I really enjoyed those 60 miles. It’s really exciting to ride something that I built and have it work. This brazing stuff is addicting. The Cycle Truck handles well but my temporary cargo box is pretty mediocre and has a lot of flex in it. There is more to do too (building the rack, a lot of finishing work, re-routing the shift cables along the top tube, installing fenders). I still hauled a decent amount of stuff in it this weekend and the bike is already proving it’s worth. I’ll probably keep quiet on the Cycle Truck until the new rack is done.

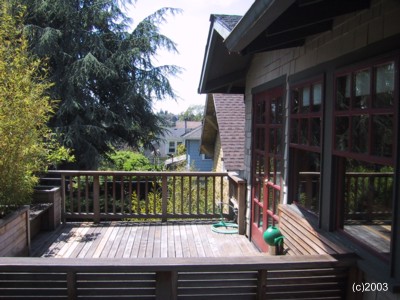
The deck is complete. We used these neat hidden fasteners called EB-TY so it just looks like one great expanse of wood. It is sectional so we can partially disassemble it should we need to do any roof repairs. We still need to put a railing up, but it is really nice to see the deck finished. I think the tigerwood looks pretty cool too.

After today’s riding and deck building I celebrated with this nice dinner:

Salmon (from Loki at the farmer's market), pea+broc+tomato salad (also all from the market), a little sticky rice, and some La Fin du Monde

I promised some new projects too. Today I rode out to Aaron’s Bicycle Repair and picked up a SRAM i-Motion 9 hub. This is going on a Bike Friday Tikit. I know, I already converted a Bike Friday Tikit to have an internal hub gear (and now even Bike Friday is doing it). I have something up my sleeve for this conversion that’ll make it more interesting. The hub came from Aaron’s Bicycle Repair (what other shop in the US stocks all of this internal hub gear stuff) and came home on the Cycle Truck.

The other project is a mountain bike. I sold my mountain bike at the swap a few years ago and haven’t missed it. My cyclocross-ish IvyCycles and RB-T do nicely off road almost all the time. However we’re spending a week surrounded by mountain bike trails late this summer and I thought it would be nice to have a real mountain bike available. If I don’t ride it much compared to the IvyCycles then it’ll be on the chopping block. If I find that 60mm tires really do make a difference compared to 40mm ones then it might stick around. I bought the bike as a single speed but will be putting a Rohloff rear wheel (which is going on yet another future project) on it for now.

Wheels and a saddle came with the bike too

A little bit of progress on everything

I have nothing finished to show, but I have progress on the deck, cargo bike, and my bicycle jig.

The deck is half done. We were hoping to finish it this weekend but the 90F weather kept us off of the roof. We’re also waiting on 5 more boards to be delivered. The new decking is Tigerwood (from Ecohaus) and I really like how it looks so far. We’re using hidden fasteners called EB-TY. It took us a little while to figure out the best way to build the deck (especially because we are doing it in sections so that it can be disassembled), but now it is going pretty fast. Hopefully we can finish it up next weekend.

I’m embarrassed to show these photos of the cargo bike and fixture in progress because they show how much of a slob I can be about my workspace. The basement is a disaster, but I never feel like stopping work to tidy up.

The CAD drawing has been updated. There are a few changes and I switched the drawing to much easier to work with software (TurboCAD, I was using QCad).

/P>

Real progress on the cargo bike is occuring on two fronts. The first is building tooling that will be used on any frames that I built. I have most of the front triangle fixture completed. I’m building my fixture around a milling table that is 9 inches by 36 inches with 3 T-Slots running the length of the table. This table is accurately machined flat (not as perfectly as a surface plate, but well enough for bicycle frames) so I can also use it as an alignment table.Everything will be modular so that I can use the same base for building forks, rear triangles and other things.

Here is the table setup as a front triangle jig:

The bars under the seat tube and head tube are made from pieces of 80/20. They have T-slots in them too and are connected to the table using some brackets that I made. The brackets connect to the 80/20 usingT-Nuts that 80/20 sells and to the T-Nuts for the milling table. The milling table T-Nuts are setup for 1/2-30 bolts that are huge, but I bought some reducing bushings from McMaster-Carr that let me use smaller bolts. I can adjust them to any angle (using a protractor to check the angle) and then lock them into plate.

The tubing is held in these towers which are also primarily 80/20 with tube holding cones that I made on the lathe. I got the idea for these towers from a bicycle jig on Instructables, but changed the setup to be height adjustable. I shouldn’t need to adjust it once the whole thing is dialed in.

The bottom bracket is held in place with a vertical post and cones which sit on it. This is sort of an exploded view, with the top cone loosened. Everything is clamped in place with two clamping collars.

The other progress is on the cargo bike itself. As you can see in the first photo the donor frame has had it’s paint stripped (where I need to braze to it) and the headtube and downtube have been cut off.

The cargo tube on the cargo bike has some really tricky mitering. I built a fixture to do this miter (and others) on the lathe. This is what the mitering fixture looks like: (I’ll take some photos of it in use next time I’m using it).

It mounts to a T-Slot in the lathe’s compound slide. I can set the angle to on the compound slide to my miter angle and then use a hole saw to make the cuts. That block was made on the lathe and boring a 1.75″ hole took a long time. I’ll be able to use it for other tubing sizes with some reducing bushings that I need tomake. The mitering fixture works really well,but I need to tweak it a bit to get it better centered. Right now the miters are about 1mm off of center.

In that photo you can also see one of my test joints (I’ve made three of these and cut the other two apart). I’m pretty happy with the brass penetration that I’m getting,but the brazing looks a little sloppy and will require cleanup work. I’m getting better with practice, these big joints are a lot different than the little ones that I make for racks.

The joint is neat because the smaller tube completely pierces the larger one. When looking at it from the end you can see light coming around the smaller tube:

Deck (or lack thereof)

We’re replacing the roof deck that is off of our bedroom. It’s about 15 years old and most the cedar was starting to rot away. This blog entry is mostly to show that I’m sometimes busy with something that isn’t a bicycle.

This is what it looked like when we bought the house:

Removing the deck might end up being almost as much work as putting the new one in. You can’t see them too well, but there are 3 planters on the left. The middle one was about 4 feet wide, 2 feet deep and 2 feet high. It was full of golden bamboo which had become incredibly root bound. I cut (with a Sawzall) the soil up into cubic foot chunks with the bamboo still intact. The roots were so intertwined that this wore out 3 or 4 Sawzall blades. That took hours. We sidewalk recycled the bamboo and kept the plants from the other two planters.

Once we got those planters off and the built in seating that went 1/2 way around the deck we were able to get the decking itself off. That went reasonably quickly. Many of the sleepers were rotten through and you could just pry the boards apart and have the screws pop out.

This is what the remains looked like down below in the back yard. We had to be careful not to take out our neighbor’s cable when dropping lumber.

And here is our clean roof:

We’re talking to a roofer to make sure that our roof is in good shape before building the new deck. We’ll be building the new deck in 4 sections so that it can be removed if we do need to work on the roof later. The decking itself is ordered, we went with Tigerwood from the Environmental Home Center.

We love our roof deck. It doesn’t get too much shade and is great for container gardening. The cats liked it too.