Archive for the ‘cargo bike’ Category.

20" Surly Big Dummy Frame and Fork looking for a good home

A little backstory. If you don’t care then skip to the end.

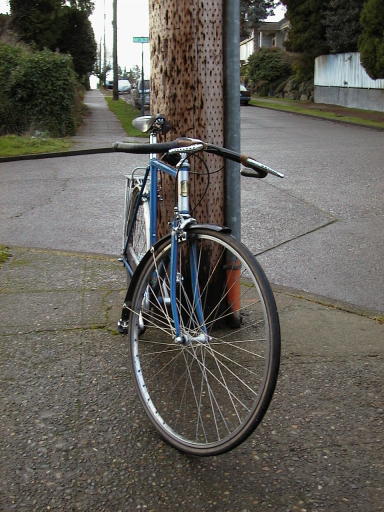
About 10 years ago I built this internal gear hubbed commuter bike with a chaincase and generator light (I know the generator light is missing from the photo, but trust me that the bike had one…this is my only photo of it):

I got a lot of help on this project from Val Kleitz and the other people who worked at “The Bikesmith”, a fantastic shop that used to be in Wallingford. This was the first bike that I builtup with their help, but it wouldn’t be the last. During the 6 or 7 years that I shopped there Val spent countless hours chatting with me, letting me hang out and absorb shop talk, and helping me learn about bikes. I know that Val has touched a lot of the Seattle bicycle community in the same way. Hahn Rossman, who also worked at that shop, is the guy who told me about the Internet-BOB mailing list, which I now host. I kind of knew about it already and protested that I didn’t own a Bridgestone bicycle (after all the list is called the Bridgestone Owner’s Bunch). He said that didn’t matter and I should join anyway. He was right.

A few weeks ago I learned that Val has cancer. Last Tuesday night there was a party and fundraising raffle to help Val with his cancer. I bought a lot of the tickets sold that night, but the amount that I spent was barely a drop compared to the flood of learning that I’ve had from Val. It is also probably a tiny drop of what Val needs to get past this illness, but I hope that it is a little bit of help.

I think I bought less than half of the tickets, but I won most of theitems. I gave almost all of them back and asked for them to be reraffled. One item in particular (a pink Brooks Swift saddle) really wanted to go home with me and I won it twice in a row,but on the third time it figured out that it really should go live with someone else.

I did win and keep the big prize of the evening,a Surly Big Dummy frame and fork. This is the backbone of a serious cargo hauler. I’d keep it, but I like building my own cargo haulers and don’t have the room for one this large (it is about the same size as my tandem…we use the tandem a lot, so the Surly won’t fit).

The Details

This is what you get, a 20″ Surly Big Dummy Frame and Fork:

This is what it can turn into (photo linked from http://thebikelane.wordpress.com/2009/04/04/todds-big-dummy/):

I brew beer and those are homebrew kegs that he is carrying. 5 gallons each is 40lbs of beer, plus about 15lbs for the keg. That is a roughly 220lb load. My cargo haulers can’t do that.

I’m selling the Big Dummy for $650. $600 of that is going to Val to help his fight with cancer. $50 of that is going to Kent Peterson who keeps all of us amused (including Val) with great stories from the trail. The frame normally retails for $1050, but they are on sale right now and many places are selling them for $700. The cheapest price online that I can find is $609. I think my price is fair, and the money is going to a good cause. I promissed Val that I’d find a buyer who would use the Big Dummy and I hope to be able to live up to that promise.

I’d strongly prefer to sell this to someone in Seattle. I’ll even deliver it to anyone within 50 miles of Seattle. I know it can be shipped, but it is expensive to do so (about $100-150) due to the size of the box.

If you are interested please email me. alex at phred dot org.

Stainless Cycle Truck Rack

John Speare has my old Cycle Truck now (giving me room in the basement to make a new one). As part of the deal I wanted to make a new rack for that bike. The original rack is long and narrow (20″ long, 16″ wide) and after riding that bike a lot I came to the conclusion that a short and wide rack would be better. This will encourage keeping the loads closer to the head tube, which is the key to carrying heavy loads and having good handling with that bike.

In addition to the size differences the new rack has also gained a U-lock holder behind the backstop and some cleats for holding die down ropes. I copied the cleats from Joseph Ahearne’s lovely cycle truck that was shown at the OBCA show a couple of weeks ago.

The old rack will be going on my next cargo bike, which will look a lot like the Cycle Truck except that the front wheel will be under the rack instead of behind it. It could look something like this:

The new rack is made out of stainless steel (316) and was my first rack made with the material. It is challenging to work with, mostly because brazing it is trickier. The bronze filler that I normally use doesn’t work with stainless. I tried three different fillers (Harris 45% silver, Cycle Design’s Fillet Pro, and Nickel Silver from Gasflux). In the end I used the Harris 45% silver on the joints which wouldn’t see high loads and nickel silver on the ones that would. The Fillet Pro was the nicest of the three to work with, but I have limited quantities of it and wanted to save it for my framebuilding projects. Nickel silver is very strong, but melts at a higher temperature and was harder to use. The fillets also don’t clean up as nicely. 45% silver is the weakest of the three, but easy to work with on stainless steel.

In the photos shown here the rack is just about finished. I have some cleanup work to do around the brazed joints (that will remove the smoky color near some of the joints).

The underside of the rack. You can see the 4 cleats as well as the 4 mounting points that hold the rack to the bike.

A closeup of one of thecleats. The rack has stainless water bottle bosses as mounting points, and the cleats screw into those.

An early photo of the lock holder. The final one has a second loop on the middle rail of the rack:

I’m delivering the rack to John a few days after Thanksgiving and will take some photos of it installed on the bike then.

Cycle Truck Finished

This facade reminded me a photo that David Wilson has of his Borracho cargo bike in the doorway of a brick building in Georgetown

I did some finish work on the Cycle Truck and sent it off to be powder coated a couple of weeks ago. It was coated by Seattle Powder Coat in Ballard. They did a nice job at a reasonable price and with a very quick turnaround. The paint is red to pay homage to the donor frame and fork that were used to build the new one (both were also red). The rack is a silver/grey. I modifed this pizza delivery bag (thanks to James Black for telling me where to get one cheaply) to fit onto the rack. The bag is 20×20x12 inches and fits perfectly.

In this photo I’m carrying a roughly 50lb load of bird seed, cat food, and random bits from the hardware store. I think this bike works well for bulky loads (better than a porteur) and okay for heavy loads (the closer they are place to the headtube the better). I don’t think it does great for loads which are both large and heavy. It isn’t good if there is a lot of weight too far forward of the front wheel. If I build another one of these I may put the front wheel about a foot forward. It would complicate the frame and it would no longer fit on standard car/bus racks, but it wouldn’t increase the bike’s overall length and I think it would improve the handling with some loads.

Finishing Details

The rack support rails have been closed off and snaps were added for holding the pizza bag:

The a downtube shift boss was added which connects to the original U-brake. That makes a very nice parking brake. V-brakes mounted on the seatstays provide the main rear braking.

The back of the cargo tube was sealed with a little bit of steel plate. This area ended up being fairly complex. Next time I might try ovalizing the cargo tube where it joins the seattube to avoid this extra work.

Here are a couple of other shots of the final bike:

Fork Fixture V-block

This weekend I also did my first major project with the new milling machine. I made a V-block for clamping a fork steerer tube. This will be the basis of my fork building jig and my fork alignment system. If you are interested in how I made it then click on the picture to see a gallery with more info. The new mill is working out very nicely.

Made A Cycle Truck Rack

I had a little bonus free time on Friday so I built the rack for the Cycle Truck. It is 18 by 20 inchesand made of 1/2 inchdiameter cromoly tubing with a 0.035″ wall thickness.

The rack itself is very basic and didn’t require much tricky work. It is a 2 dimensional rectangle and doesn’t have any stays or back stop (a back stop is not necessary since the head tube acts as one).

The connection between the rack and frame was the hardest part of the project. The frame has two support bars brazed to the cargo tube. These are made from 5/8″ square tubing and are mitered to fit around the cargo tube. I was careful to make sure that these were square to the cargo tube and head tube in the horizontal and vertical planes.

The support bars have 6mm holes at each end that the rack mounting bolts run through. The bolt, support bar, and rack look like this when connected together. The bolt goes into a threaded pillow block that I made on the lathe. The pillow blocks are brazed onto the rack. I thought about just brazing the rack directly to the frame, but wanted it to be removable so that I could easily replace it (if it gets damaged) or exchange it for a cargo box if I end up making one of those.

The hardest part was getting everything to line up well. There is no tolerance for error in the fitting of the pillow blocks to the support bars, the distance between bolt holes and the threaded part of the pillow block needs to be exact. What worked best (after some bumps along the way) was to braze the rear support bar to the frame, then thread bolts through the pillow blocks. The rear pillow blocks were tacked to the rack, then I placed the front support bar on the cargo tube and did the same thing there. Since all of the bolts were in place during the brazing everything was perfectly aligned.

I’ve done some load testing around the neighborhood with a 40lb load and the rack and bike handled well. I’ll be doing more rigourous testing and with higher loads later to see if I’ll need structure tying the rack to the frame. I expect that I’ll be adding two more stays that go from the rear support bar to the top of the head tube. This will both add some rigidity and will give me a nice place to mount water bottles. My goal is for the bike to ride nicely with loads in the 50-75lb range.

On Sunday I used it to carry this bulky but fairly light load. This is the kind of stuff that is really a bit too big for a normal porteur rack but small enough that I don’t like having to pull my trailer out for it. The Cycle Truck fits that niche between trailer and porteur nicely and I think I’ll be using it quite a bit.

I’m reorganizing the Cycle Truck photos into a new galleryto try and make it easier to understand the whole process without having a lot of extra photos. My only regret in this project is that I often got too involved and forgot to pick up the camera and take a helpful photo or two.

Some Projects Wrap Up, Others Begin….

I rode about 60 miles on the Cycle Truck during the last week. During the week I was just riding it as a naked bike, but yesterday I fashioned together a basic container using a recycle bin and some muffler clamps. It’ll do until I have a chance to build a real front rack (right now I’m waiting on metal, tools, and my bag!).

Muffler clamps and U-channel make a temporary rack

Alistair gives it a spin around the block

I really enjoyed those 60 miles. It’s really exciting to ride something that I built and have it work. This brazing stuff is addicting. The Cycle Truck handles well but my temporary cargo box is pretty mediocre and has a lot of flex in it. There is more to do too (building the rack, a lot of finishing work, re-routing the shift cables along the top tube, installing fenders). I still hauled a decent amount of stuff in it this weekend and the bike is already proving it’s worth. I’ll probably keep quiet on the Cycle Truck until the new rack is done.

The deck is complete. We used these neat hidden fasteners called EB-TY so it just looks like one great expanse of wood. It is sectional so we can partially disassemble it should we need to do any roof repairs. We still need to put a railing up, but it is really nice to see the deck finished. I think the tigerwood looks pretty cool too.

After today’s riding and deck building I celebrated with this nice dinner:

Salmon (from Loki at the farmer's market), pea+broc+tomato salad (also all from the market), a little sticky rice, and some La Fin du Monde

I promised some new projects too. Today I rode out to Aaron’s Bicycle Repair and picked up a SRAM i-Motion 9 hub. This is going on a Bike Friday Tikit. I know, I already converted a Bike Friday Tikit to have an internal hub gear (and now even Bike Friday is doing it). I have something up my sleeve for this conversion that’ll make it more interesting. The hub came from Aaron’s Bicycle Repair (what other shop in the US stocks all of this internal hub gear stuff) and came home on the Cycle Truck.

The other project is a mountain bike. I sold my mountain bike at the swap a few years ago and haven’t missed it. My cyclocross-ish IvyCycles and RB-T do nicely off road almost all the time. However we’re spending a week surrounded by mountain bike trails late this summer and I thought it would be nice to have a real mountain bike available. If I don’t ride it much compared to the IvyCycles then it’ll be on the chopping block. If I find that 60mm tires really do make a difference compared to 40mm ones then it might stick around. I bought the bike as a single speed but will be putting a Rohloff rear wheel (which is going on yet another future project) on it for now.

Wheels and a saddle came with the bike too

Realized

Imagined:

Realized:

Full photo set.

Next steps — Build it up(they knobby rear tire isn’t staying) and ride it, then build a rack for it. Alistair helped me with alignment today and took a few photos too. The framebrazing is done except for a couple of water bottle bosses and whatever other brazeons I realize that I forgot.

We measured the angles today, around 71.5 seat tube angle and 73.5 for head tube angle. Fork offset is around 30-35mm (this is a fork from a Bike Friday Family Tandem) giving a trail of about 35-40mm and flop of about 10-11mm. Right in the ballpark.

A little bit of progress on everything

I have nothing finished to show, but I have progress on the deck, cargo bike, and my bicycle jig.

The deck is half done. We were hoping to finish it this weekend but the 90F weather kept us off of the roof. We’re also waiting on 5 more boards to be delivered. The new decking is Tigerwood (from Ecohaus) and I really like how it looks so far. We’re using hidden fasteners called EB-TY. It took us a little while to figure out the best way to build the deck (especially because we are doing it in sections so that it can be disassembled), but now it is going pretty fast. Hopefully we can finish it up next weekend.

I’m embarrassed to show these photos of the cargo bike and fixture in progress because they show how much of a slob I can be about my workspace. The basement is a disaster, but I never feel like stopping work to tidy up.

The CAD drawing has been updated. There are a few changes and I switched the drawing to much easier to work with software (TurboCAD, I was using QCad).

/P>

Real progress on the cargo bike is occuring on two fronts. The first is building tooling that will be used on any frames that I built. I have most of the front triangle fixture completed. I’m building my fixture around a milling table that is 9 inches by 36 inches with 3 T-Slots running the length of the table. This table is accurately machined flat (not as perfectly as a surface plate, but well enough for bicycle frames) so I can also use it as an alignment table.Everything will be modular so that I can use the same base for building forks, rear triangles and other things.

Here is the table setup as a front triangle jig:

The bars under the seat tube and head tube are made from pieces of 80/20. They have T-slots in them too and are connected to the table using some brackets that I made. The brackets connect to the 80/20 usingT-Nuts that 80/20 sells and to the T-Nuts for the milling table. The milling table T-Nuts are setup for 1/2-30 bolts that are huge, but I bought some reducing bushings from McMaster-Carr that let me use smaller bolts. I can adjust them to any angle (using a protractor to check the angle) and then lock them into plate.

The tubing is held in these towers which are also primarily 80/20 with tube holding cones that I made on the lathe. I got the idea for these towers from a bicycle jig on Instructables, but changed the setup to be height adjustable. I shouldn’t need to adjust it once the whole thing is dialed in.

The bottom bracket is held in place with a vertical post and cones which sit on it. This is sort of an exploded view, with the top cone loosened. Everything is clamped in place with two clamping collars.

The other progress is on the cargo bike itself. As you can see in the first photo the donor frame has had it’s paint stripped (where I need to braze to it) and the headtube and downtube have been cut off.

The cargo tube on the cargo bike has some really tricky mitering. I built a fixture to do this miter (and others) on the lathe. This is what the mitering fixture looks like: (I’ll take some photos of it in use next time I’m using it).

It mounts to a T-Slot in the lathe’s compound slide. I can set the angle to on the compound slide to my miter angle and then use a hole saw to make the cuts. That block was made on the lathe and boring a 1.75″ hole took a long time. I’ll be able to use it for other tubing sizes with some reducing bushings that I need tomake. The mitering fixture works really well,but I need to tweak it a bit to get it better centered. Right now the miters are about 1mm off of center.

In that photo you can also see one of my test joints (I’ve made three of these and cut the other two apart). I’m pretty happy with the brass penetration that I’m getting,but the brazing looks a little sloppy and will require cleanup work. I’m getting better with practice, these big joints are a lot different than the little ones that I make for racks.

The joint is neat because the smaller tube completely pierces the larger one. When looking at it from the end you can see light coming around the smaller tube:

My new bike project — Cargo Bike

A year or two ago I drew up this design for a 20″ front, 26″ rear wheeled cargo bike and posted about it on this blog. This basic design is often called a cycletruck after the classic Schwinn sold around WW2.

The idea is that a smaller front wheel leaves more space for a big rack over the front wheel. The nice thing about this design is that the wheelbase is normal (so I can easily store the bike), but it has a pretty large hauling capacity. James Black extended this design in his cycle truck (built by David Wilson) by using a large boom over the front wheel to support the rack and 20″ wheels front and rear to allow for a low rear rack too. His cycle truck is probably the best of the compact cargo bike designs that I’ve studied or ridden.

One of my planned brazing projects has been to build a cycletruck of my own. I wanted to keep it simple, so I’m starting with a donor MTB frame. Yesterday I was going by Recycled Cycles and found the perfect frame on their free rack — a ~1990 Trek 800 in my size. To most people this is pretty junky, but for this project it’s exactly what I needed. The tubing is unbutted, so I can cut off the head tube and braze on a new one without worrying about where the tubing gets thin. It looks like it has already lived a good life, so I don’t feel bad chopping it up. I also have an old Bike Friday 20″ fork that will work nicely for the front wheel.

Here is the CAD drawing of what I plan on doing to it (click for big if you want to read dimensions):

The plan is to braze on a new head tube which is longer and steeper (73 degrees vs the 71 degree HTA on the bike today). Then I’ll run a 1 3/4″ x 0.058″ tube from the seat tube, around the head tube, and sticking out over the front of the bike. The original downtube will miter into this (or I’ll make a new downtube that goes from the BB to the base of the head tube). A roughly 18″ by 20″ rack made of 1/2″ tubing will sit over the front wheel.

It’ll be challenging for me, I haven’t done anything on this scale before. A few of the tricky bits are going to be making a nice through hole in that 1 3/4″ tube for the head tube and fixturing it to keep the frame well aligned during the brazing process. I’ll need to build tooling for some of that and plan on documenting my progress as I go. I have an aggressive goal of having this finished by the July 4th Cargo Bike Ride, but if I miss that target I won’t be surprised or feel too bad.