Archive for the ‘Bicycles’ Category.

Norwegian Woods

I’m in Oslo, Norway, for work.  This is my 5th trip here in 2 years and my favorite previous trip here included a short hike into the Nordmarka.  Earlier this week I was trying to decide if I should bring my bike.  The facebook conversation went like this:

Alex: My normal travel dilemma comes up again. Is the hassle of flying with a S&S (fits in a big heavy suitcase) bike worth the rewards? Leaning towards yes since Oslo is surrounded by awesome forest and I have a couple of days free.

Joby: EVERY time I hauled my travel bike along on a trip I was super glad I did. I think it’s always worth the trouble.

That did it, since I’ve always found bringing a bike to be the right choice.  I was going to bring a bike.  I decided to bring my folding bike (with small wheels) because it’s easier to pack and deal with in airports and on trains.  My full size bikes are nicer to ride in the woods, but for a single day of riding that wasn’t worth the tradeoff.

The awesome thing about Oslo is that there really aren’t suburbs.  The city is about the same population as Seattle, but with double or more of the density.  No suburbs and high density means that the woods are a short distance from downtown.  In a 30 minute bike ride from the my hotel I could be out in the woods.

I slept in late and left the hotel with my bike around 11:30.  I followed a pretty small river out of town because the internet made it sound like there was a bike trail alongside.  There was, but it was more of a walking trail (it had stairs) and frequently disappeared.  However it was good enough to link me into the biking network and signage.  Oslo’s bike infrastructure looks a lot like many US cities and consists of bike lanes, some trails, and signs that help you get from place to place.  Once I figured out which signs to follow it was easy to get out of town.

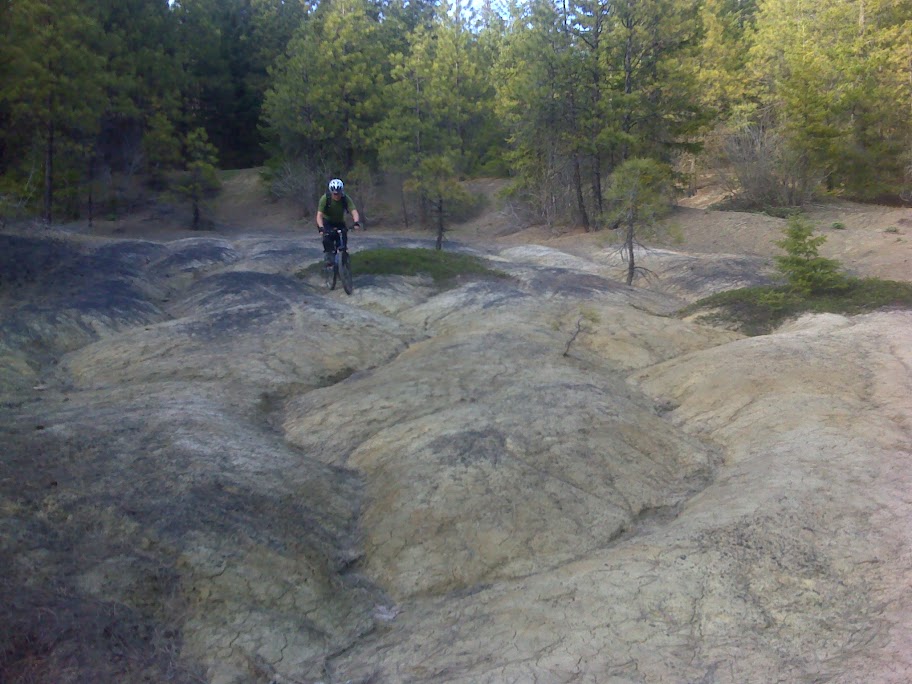
When I made it out to the woods I just took the first trail that I saw.  At first this was okay, but then I ended up on a narrow hiking trail with some big drops that weren’t suitable for my bike’s tiny 16″ wheels.  It was still really enjoyable to hike on, and the folding bike is easy to carry.  I hiked with the bike for about 1.5 hours until I came across a ski jump and watched kids in a ski jump competition.  It’s October, so there isn’t any snow yet, and they were jumping onto something that looked like astroturf.

From the ski jump I figured out that it was better to ride on what my GPS indicated were “lit trails”.  These were cross country ski trails that had lights on in the winter, and the base was a hard packed gravel that was fine on my 16″ wheels.  They also had more pedestrians, but it was nice to see how active the Oslo natives are.  The woods felt alive, but it was also easy to have stretches where I didn’t see anyone.

I really enjoyed going around a large lake which was surrounded with farms and trees that were changing colors.  It was just stunning.  I was also getting hungry at this time and I realized that I should find food.  At one junction a good map showed all of the intersections with food.  30 minutes of riding uphill and I was at a mountaintop cafe where I got a waffle, some apple cake, and hot chocolate.  Good calories for a day in the woods.

As I was hanging out at lunch the sky got a little darker, the air a bit cooler, and the wind picked up.  I wasn’t too well prepared for rain, so at this point I wanted to head back towards the city.  I followed the trail signs for a transit station name that I recognized and rode past 3 more beautiful little lakes on the way.  When I got to the transit station the gravel trails ended and the pavement began.  I rolled downhill following the bike signs for “Sentrum” and ended up back in the urban core where my hotel is located.

My GPS says that I biked around 30 miles or 50km.  I just know that I spent left my hotel a little before noon and got back a little before 5.  During most of the time in between I was lost in the woods and loving it. 

all photos

Sailing around Bainbridge Island

There is a bike picture at the end, I promise.

Sailing Trip

Christine and I took our new sailboat “Lutra” out for it’s first overnight cruise this weekend.  It was also our first time taking the boat onto Puget Sound, normally we just sail on Lake Union and Lake Washington.  Getting out to the sound requires going through the Ballard Locks.

On Saturday morning (way too early in the morning according to Christine) we left from Lake Union, went through the Ballard Locks, and crossed over to Bainbridge Island.  We went in circles for a little bit trying to decide which direction to head around the island, and finally decided to head north.  One of Christine’s highlights was seeing a small pod of harbor porpoise in this area.  We anchored for a lazy lunch at Port Madison on the north end of the island and waited about 90 minutes for the currents to change, then headed south with a tailwind through Agate Passage (against a small current).  The winds were highly variable on the west side of Bainbridge Island and after about 30 minutes of calm turned to come from the south.  We tacked down the passage between Bainbridge and the mainland and found some much stronger and gustier winds near Bremerton.  From there we turned north again up the small Dyes Passage and set anchor in Phinney Bay for the night.

The night was pretty good, but we learned how much an anchored sailboat can move around in a moderate wind.   In early morning I woke up and moved us to the better sheltered Ostrich Bay and we slept there for another few hours.  I actually slept until 9am, which is way beyond my normal rising time.  The boat is pretty comfortable once situated.

On Sunday we awoke to grey skies, cooler temps, and higher winds.  We started to tack back down Dyes Passage, but progress was slow and gusts were high and coming from different directions so we gave up and used the motor for a little bit.  We sailed the rest of the way from Bremerton, through Rich Passage, up around Bainbridge Island, and back to the locks.   From Eagle Harbor on Bainbridge Island back to the locks was one long leg with the wind across our beam and no needs to trim the sails.  It was very pleasant, and we saw a few large groups of harbor seals too!  Just as we approached Seattle the sky turned blue and we had a warm and easy motor back through the locks and to our berth.

This isn’t an actual GPS track, but I made a rough map of our route on gmap-pedometer.

Our lunch spot in Port Madison

The foredeck of the boat makes a nice place to be lazy.

Coming through Agate Passage. We were going wing and wing (meaning jib on one side, main on the other, with the wind behind us), as were most of the other boats behind us. Wind was light, so we made slow but steady progress against the 1.5 knot current.

Christine minding the helm as we were heading south along Agate Passage

This is where I'm holding up the mast of the boat

There was a strong current coming out of Rich Passage as we passed by it on Saturday night. The smart boat sailed up the side, away from the current. The other was driving up the middle.

Sunset from our anchoring point in Phinney Bay

Any kitchen that allows me to make an omelette and coffee feels like home.

Heading back towards Seattle. The skies and seas were a bit darker most of Sunday. The wind was nice though, and the ride home was pretty pleasant.

Passing through the Ballard Locks back towards Lake Union

Back in Seattle to our home port of Lake Union. Seaplanes are constantly taking off and landing near us.

Bike News

I bought a new to me mountain bike.  I wasn’t looking for one, but this came up on Craigslist and just called out to me.  It is a S&S coupled titanium Seven Verve that was purpose designed for the Rohloff Speedhub.  The seller was using it as a commuter/city bike, so it came with slick tires and a rigid carbon fork.  I moved over the tires and suspension fork from my old mountain bike and got some new Shimano XT hydraulic disk brakes for it.  My old mountain bike frame went to John Speare, it fits him a lot better than the Salsa Ala Carte that he was riding.  His Salsa is now my loaner MTB and has many of my spare parts on it.  More on that bike later.

I took the Seven out to Fort Ebey State Park with a few friends last weekend and had a blast.  It’s a great riding bike.  Here are a few photos of the bike, plus one cell phone photo that John took of me at Ebey.

My new Seven

Disk Rohloff, Shimano XT hydraulics, XTR cranks

Head shot, with the Reba fork. I love that fork, it is very plush and easy to adjust.

Me riding down the Braveheart Trail in Fort Ebey on the Seven

Sailing

sailing "wing and wing" in our new boat

The blog’s been quiet recently because I’ve been busy with my new hobby: sailing (I’ve also been busy at work).

About 6 weeks ago Christine and I bought a 1984 Catalina 25 sailboat.  Since then I’ve been spending a lot of time down at the dock doing repairs, cleaning (which seemed to be neglected for the last few years), upgrades, and of course, sailing.

1984 Catalina 25 with a tall mast and fin keel. We've named her "Lutra". The boat isn't a brown as it looks in this photo, it was just taken close to dusk.

I’ve always been intrigued by sailing since having a few day introduction to it in high school from a family friend.  I’m excited about the possibilities for slow and low impact travel (like cycling and kayaking), but with a bit more of the creature comforts of home.  We hope to take it up to the San Juans this summer, and farther north the following summer.  We both started with close to zero experience, so before buying a boat we took sailing classes at The Center for Wooden Boats.  Our instructor was great, the boats that they teach on were great, and the setting (Lake Union in downtown Seattle), was also great.

Christine completing her checkout sail at The Center for Wooden Boats. That's on a 20' Blanchard Knockabout, not our boat.

We picked this boat because it’s small enough for us to handle comfortably, but large enough for us to sleep on.  The interior has a main cabin with a little dinette and galley (kitchen), a tiny little head (bathroom), and then a front vee-berth that we can both fit in comfortably.  There is another second 1.5 person bed in the back called the quarterberth that we use for storage.  The cabin isn’t big (headroom is around 5′6″), but it’s cozy and much larger than any tent that we’ve camped in.  We liked this particular boat because it was in good condition (although dirty), the right price, has a reasonably good reputation, there is great support for it, and it was affordable.  There were about 6000 of this model made, an online store that specializes in parts for it (so I could get a replacement rudder in a week instead of making a custom one), and a great online forum with lots of helpful archives and members.  It’s not big, fast, or fancy (I think of it as the Ford Focus of sailboats), but it seems like it’ll suit our needs well.

Our boat's cockpit. I've refinished a good chunk of the teak, but there is a bit left to go.

Looking down into the interior of the boat from the cockpit. We had replacement cushions made.

The dinette (which reminds me of a fast food restaurant booth), the galley, and the quarterberth area that we use for storage (my folding bike even fits back there). The dinette turns into another small bed when the table is lowered.

The galley has a sink (we need to clean out the water tank though), and a little two burner alcohol stove, and a built in cooler in the corner of the counter. We also have a grill that sets up on the back of the boat.

Our cozy little "vee berth". It's about the size of a double bed with the front corners cut off.

We keep it on a small private marina that is on the northeast side of Lake Union. There are only about 15 boats kept here, but everyone that we've met there has been great.

We’ve named her Lutra after Christine’s favorite water critter, the otter.  We haven’t put the name on the boat yet.  She was previously named the great surprise, and before that appears to have been named Lwellyn.  Once we’re done cleaning it up well enough to remove the old names we’ll put on the new one.

Bikes

Travel Gifford on a "Gravel Grinder" group ride. Those are the awesome Compass 26x1.75" tires and I think the bags are from Epic Designs.

For those who have no interest in boats, but come here for bikes, here is a minor update on the Travel Gifford.  It’s been painted pumpkin orange (an homage to the Bridgestone XO-1 and because I’ve never had an orange bike) and my friend Scott has taken it to Australia for a couple of weeks.  He’s putting it to great use and has been hanging out with the crowd from “Commuter Cycles” in Melbourne.  This bike is going to be very well travelled.

Scott and the Travel Gifford, in Melbourne Australia

Travel Gifford

On my last blog post I mentioned a secret project.  I built an adventure touring bike (basically the same geometry as Gifford) that uses S&S couplers to make travel easier while waiting for the dropouts to arrive for my other frame project.  I’m really happy with how this one came out, especially since I started it only 4 weeks ago.  This also makes it the first complete bicycle to come off of my new frame fixture.

As I mentioned it is very similar to Gifford.  The head tube angle is 73 degrees and the seat tube angle is 72.5 degrees.  It is built for 26″ (559mm) wheels because they pack a bit more easily into S&S cases and it will be easier to find replacement tires in foreign countries.  There is tons of tire clearance, the photos here show it with 50mm knobby tires and fenders will fit above those.  I’ll probably run it with 45mm or so slicks most of the time.  The 60mm knobby tires from my mountain bike even fit.

The frame is a bit larger than the other Gifford to make it on the slightly large size for me and to make it fit many of my taller friends who might use this as a loaner bike.  Sizing is about the same as a 60cm Long Haul Trucker.  This one is also built with derailleurs instead of a Rohloff hub to keep costs down.  Tubing is similar to the first Gifford, Columbus SL (standard diameter 9/6/9) front triangle, the same Nova single bend chainstays, and some True Temper oversized seatstays that looked good to my eye.

It will eventually get a coupled porteur rack to go along with it.  It is shown here only partially assembled because my friend Andre is going to do the rest of the assembly and give it a test ride.  He is interested in this style of bike and is waiting for the next batch of Rawlands rSogn frames to be made.  In the meantime he’ll get to use this one for a few months.

Lots of tire clearance up front under the Pacenti Biplane crown

Lots of tire clearance in back too. The oversized double taper seatstays will make the braking firm.

The seatstay cluster is fairly plain, but gets the job done. This is the trickiest part of the bike for me to get right.

Single bend chainstays clear 48/38/24 chainrings (barely) and provide good tire clearance.

There are more photos on my smugmug site.

I’m going to be asked how I got the S&S couplers.  These were removed from a damaged frame  but where the couplers were intact.  I cleaned them up carefully and reused them.  It would be nice if S&S sold them to hobbyists, but I understand why they don’t.  I really enjoyed working with the couplers, they must be the most precise lugs ever made.  The fit was perfect and they have very nicely tapered edges.  I inserted the couplers into my downtube and toptube before they were brazed into the frame, but after the tubes were mitered and fit to my jig.  That method seemed to work nicely for me, and the couplers have perfect alignment.

I’m really excited to get this one on the road.  I have a bit of travel coming up soon and may bring the bike with me, even though I hadn’t really planned on bringing a bike.  In the meantime I look forward to hearing what Andre has to say about the ride.

Snow Day

It’s been quite on the blog since I’ve been busy working away on a top secret project and traveling for work.  The blog should pick up soon.

Today Seattle has a few inches of snow.  The last time that we had snow like this was Christmas 2009.  I woke up early and enjoyed a nice ride in the stuff with Rory.  I’m glad to get to ride it in once in a while, but I’m happy not to have to commute in it on a daily basis.

Secret project hint: It is a variation on Gifford, my adventure touring bike.  Here is a teaser (that is a 48mm wide tire):

Seat tube angle adjustment on the frame fixture

There was some confusion on the framebuilder’s list on how the virtual pivot point works on my frame fixture (and on the Arctos).  I took some more photos to try and explain how it all works.

Here are some photos showing how the parts fit together:

This is the seat tube angle adjustment backplate. The adjustment plate rides in the groove slot on some brass pins. There are some machining errors visible in this view, but they don't affect the precision.

This is the back of the adjustment plate. The groove in it is for the locking handle to pass through.

The adjustment plate is mounted on the backplate.

This video shows it all in action.

Click this photo to see a video that shows it all in action. Watch how the BB position doesn't change.

A New Bike and My Next Project

A couple of months ago I bought a 2009 Novara Fusion bikes on closeout from REI:

The REIs around Seattle had a small number of these for half of their original price.  The bike came with front and rear Alfine hubs, generator lighting, fenders, a rear rack (that I removed), a chainguard, and disk brakes.  Not bad for under $500!

There are some nice details.  This taillight is battery powered and turns on automatically turns on if the bike is moving and it is dark out.  Sadly it uses a non-standard N battery, otherwise it is nicer (in brightness and function) than the Planet Bike Fenderbot.

There is a cool bell that is built into the brake lever that I’ll have to take a photo of later.

The disk caliper is tucked away on the chainstay, out of the way of the seatstay and rack and fender mounting.  The dropout even has provisions for the included kickstand:

I did replace a few components.  The stock cranks were wide and not very nice, so I put on something better.  I also replaced the tires, pedals, handlebars, and grips.

My next project is to replace the fork and frame with ones that I build.  The Novara frame has a reasonable geometry and fits me alright, but I don’t like the very stiff aluminum.  The fork needs more rake if it is going to work well with a porteur rack.

Tubing arrived for the new frame this week.  I’m using Pacenti Slant Six lugs with True Temper Verus HT 8/5/8 oversized tubing.  The lugs will keep the sloping top tube of the Novara, a feature that I like because it makes it a bit easier to loan the bike to friends who are shorter than me.  I don’t like the chain tensioner that came with the Novara, so I’m going to switch to the Engin/Paragon Rocker dropouts which have chain tensioning built in:

I think I’ll make my own front dropout that incorporates the disk mount and which extends high up the fork blade.

I’ve also been riding my last project all summer, but haven’t posted a photo of it since having it powder coated.  I still don’t consider the bike done because I haven’t built the light weight rear wheel or had the stem and rack chromed.  I’ve still put over 1000 miles on the bike in this unfinished state, so I maybe I should call it finished.

I love this bike.  It is fast, light, handles well, and looks nice.

mountain bike weekend

Rory and I left work about an hour early on Friday and headed across the mountains for a pair of back to back mountain bike rides.  On Friday night we explored the trails over Roslyn, WA, trying to follow a map that we had for a route called the Rat Pac.  I think we were only half successful in following the route, but we had a great ride on a really nice clear evening.

Rory

Me

Nice views

Nice trails

Clear skies, bright moon

"slickrock". I don't think it really was, but the surface was fun to ride on anyway.

"slickrock": photo by Rory

This was probably not the most stable ground to stand on

There are more photos on my smugmug site and Rory’s Picasa site.

We had dinner in Roslyn at “The Brick” (made famous in the TV show Northern Exposure) and stayed at Rory’s parent’s cabin in Cle Elum.  The next morning we got up early and headed a bit farther east to the Taenum Creek area to do a 20 mile loop known as Fishhook Flats.  When Rory sent out the invite he put in this crucial statement: “The route will be fishhook flats, which i’m pretty sure is snow free by now(no guarantees).”  I should have learned from last year’s Mount Catherine ride with Rory that this was a sure sign that we’d have plenty of snow to ride through.

The ride was great, but we did walk 5 or more miles of the route due to snow.   We decided that this upgraded the ride from being sort of long into the epic category.  The riding that we did do was really nice though, without too much crazy steep stuff and with trails that were in pretty good shape.  I’m pretty sure we were the first people on most of the trails this season, there were no signs of other traffic through the snow.  The weather wasn’t as clear as on Friday night and it was a bit cooler, but we didn’t have any rain.

The route starts along this old decaying dirt road.

This was our first snow.

This large open field could make a great home base for a mountain bike camping weekend. There was space for at least 50 tents.

There was a fair amount of blow down this early in the season.

6 inch deep snow like this is the most frustrating, because it seems like it should be ridable, but it isn't.

We tried anyway

Peanut butter and honey in a packet might be my new favorite trail food.

Our second lunch stop location, down below the worst of the snow.

Where there wasn't snow there was plenty of mud. Photo by Rory.

The quantity of snow often had less to do with the elevation, and more to do with the exposure of the ridgeline and the thickness of the tree canopy.

Stream crossing

This last section along the North Fork Trail was snow free and really good riding. I was really tired by this point, so Rory had to wait for me somewhat often. The views of the creek below were nice.

The creek had plenty of bridges, all in good condition.

Lots of mud!

My photos

Rory’s photos

Ivy-T stem

This is the first stem that I’ve built.  I did this one jigless, just counting on accurate miters to hold everything in place.  That worked pretty well, except that my front clamp was about 1mm off center (fixed that with a file, but that made it slightly narrower than I wanted.

Some details:

  • 1″ x 0.058″ extension (9cm long), 1.125″ x 0.058″ spacer, 1.125 x 0.051″ clamp.  I’d prefer to have more material on the clamp in the future, and may buy some thick wall 1.25″ stock to turn down.
  • roughly 95 degree angle (not measured precisely because it doesn’t really matter)
  • roughly 9cm long (same reason)
  • integrated cable hanger and spacers
  • non-stainless bolts for strength
  • the cable hanger fully pierces the top and bottom of the stem

double miter for the clamp and front

Checking the miters. Not done yet, there is too much of a gap under the handlebar clamp.

Brazed up. No burnt flux here!

I haven’t fillet brazed in quite a while, and was very happy with how these joints came out.   They didn’t require too much cleanup.

New MTB

I built this up just in time for a late snow in Seattle:

My new mountain bike: Kona Explosif, Rockshox Reba SL fork, Rohloff, BB7 Disks (click for more images and closeups)

I found many of the parts (frame, fork, front wheel, disk brakes) at the Seattle Bike Swap for very good prices (under $300 total).  The frame called out to me immediately since it has sliding dropouts that work well with my Rohloff hub and nice steel tubing (TT Platinum OX).  The fork was never used and cost about 1/4 of it’s original price (thanks to Andre for finding that one).  The front wheel is the stupidest front wheel that I own: Shimano XT with aluminum nipples and straight spokes, but it was cheap, also new, and had the disk mount that I needed to work with this fork.

I’ve enjoyed more mountain biking in the last year and expect to get a lot of use out of this bike.  It’s a size larger than my previous Rocky Mountain.  I think I’ll prefer that, the top tube is much longer (over an inch longer) so I’m running a short stem and won’t be hanging way out over the front wheel.

This buildup was really quick and I took a lot of short cuts that involved zip ties, but I doubt that I’ll really change it anytime soon (except for removing the studded tires and going back to normal knobbies).

Also, if your only rear disk wheel is 700C and you really need to build up a MTB quick, you can run it:

700C rear, 26" front

It looks stupid, but worked fine and got me to work and back on a day when snow and ice were in the forecast.  I swapped the rim out for the 26″ one after a day.