Progress on Rory’s Cycletruck (aka the Cargo Turd)


Rory and I started working on this bike quite a while ago, then took the summer off (summers are for riding, not workshop time). This weekend the weather wasn’t great and I had to stick around home, so we got some time to put the finishing shop time on it.
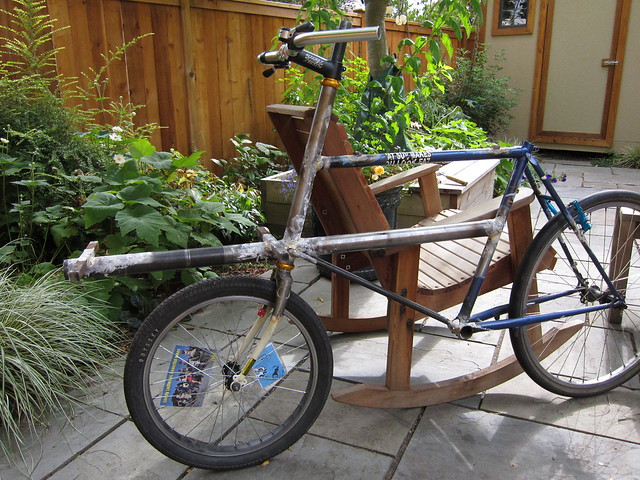
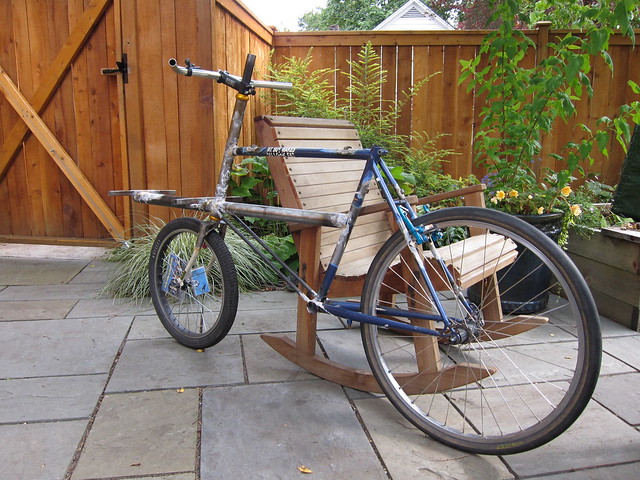
The donor frame is John Speare’s “Fuji Turd”. As with my cycle truck conversion the rear triangle and top tube remain, the downtube and cargo tube were added. This bike has a little slacker head tube with a bit more offset to get the front wheel a little more under the load.
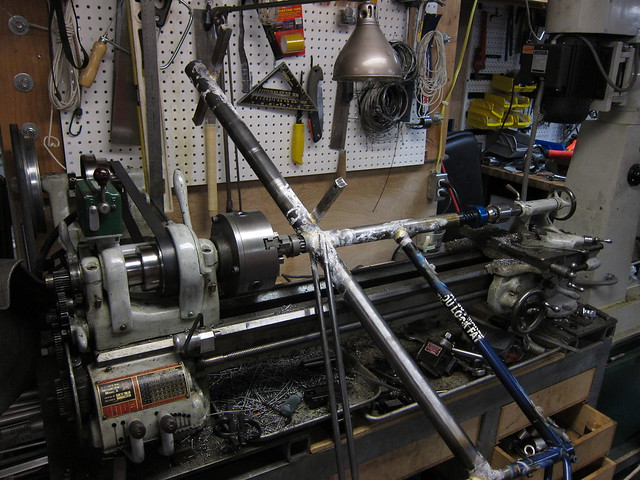
Rory got creative and used twin tubes 1/2″ tubes for the downtube rather than a traditional one. It sure was easier to miter, and it should be strong enough since the cargo tube is also supporting the seat tube. Other important weight saving features are a custom “80/50/80″ (in thousanths) external butted cargo tube, a similarily butted head tube and a big hole in the bb shell where the original downtube used to be.
Rory did all of the brazing on the frame. He’s built a few racks, but this is his first project with larger joints. That thick cargo tube and head tube took some real heat, but the brass penetration is good and a test joint came out well. A more experienced friend helped him with the fork. I helped him a lot with the mitering, fixturing, and lathe work.
Double butting the cargo tube:

Yes, that is a big hole in the bottom bracket. This shot is from adding the mixte-style downtubes:

A very nice fork, and a temporary front wheel:

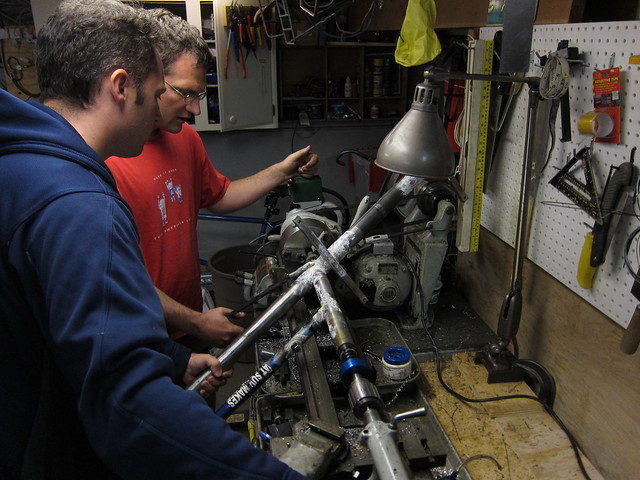
That really long head tube was a challenge. I made tooling to hold my Park head tube reamer and facing tools on the lathe. The regular Park holder is really only designed for head tubes up to 10″ or so in length, this one is almost 2 feet. My lathe has a 36″ working distance between the headstock and tailstock. We ran it at a very low 40rpm, with me operating the headstock and Rory holding the frame and adjusting the tailstock to get the right preload on the tension spring. It worked nicely. When I get a chance I’ll take photos of just that tooling and link to them in a comment on this entry.
Setup for facing the bottom of the head tube:

I’m controlling the power, Rory is holding the frame and controlling the tension of the tailstock spring:

Tomorrow is the Labor Day Cargo Bike Ride in Seattle. Rory is hoping to have the bike in a rideable condition by then. A drum brake hub for the front wheel is on it’s way, so the bike will just have a rear brake for the time being. As with all experiments it will probably be ridden quite a while before we add finishing touches and get it powder coated.
so i got the new front wheel/drum brake on, and it works a lot better when you have the ability to stop with both wheels.
I also played with how much should go on the front. so far, I think 2 bark bags is the limit. maybe more is possible, if you could put some more load on the back so it wouldnt flip up.
thanks again for use of space/flux/brass/gas/designs/knowledge. this bike is truly awesome.
How much does a bark bag weigh? On my cycle truck it seemed like heavy loads were fine, but you do want to have them as far back as possible. That is the biggest problem with the rack that you are using, with no backstop it is difficult to strap things down all the way back. Perhaps we should add one and just have it re-painted.
Looking good. Hope to see it in person at some point.
i think a bark bag weighs about 20-25 lbs. the bark bags laid flat on the rack(about the size of a bark bag), and i didnt try to push it back any further. i”m beginning to think that having a backstop brazed to the head tube is actually a good idea that mark had. also, i wouldnt need to get the rack template repainted, and better yet, i would have to remove the powder coat.
I forgot to mention cutting oil. thanks for the use of the cutting oil, too!